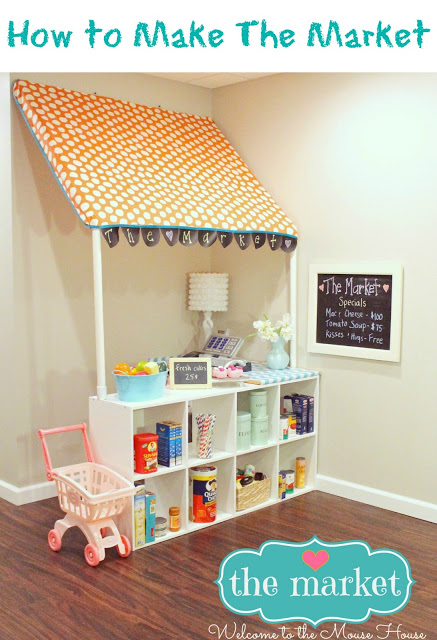
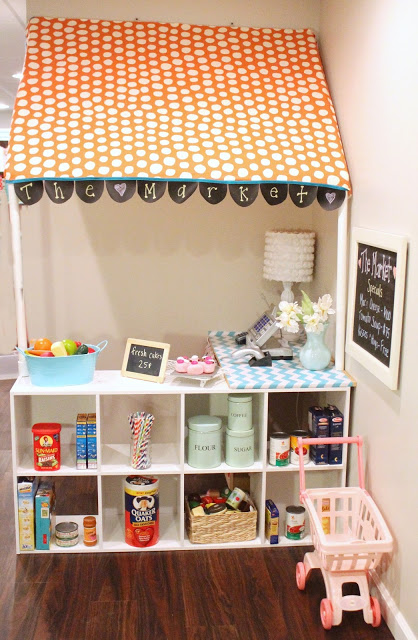
Learn how to make a Market of your own!
Now, obviously, everyone’s measurements are going to be different, so I am not going to provide those. My space may be larger or smaller than what you have to work with so measure your space and determine the lengths you need before heading to the hardware store.
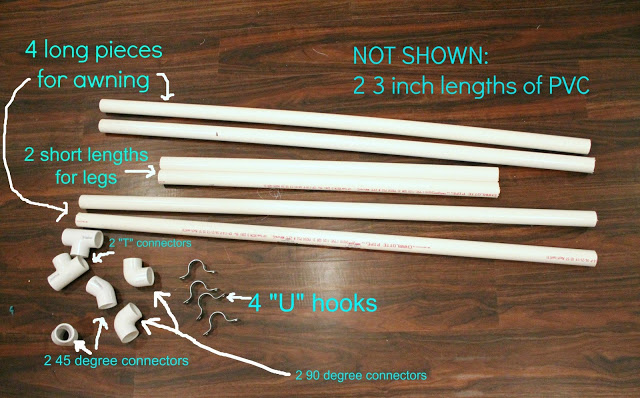
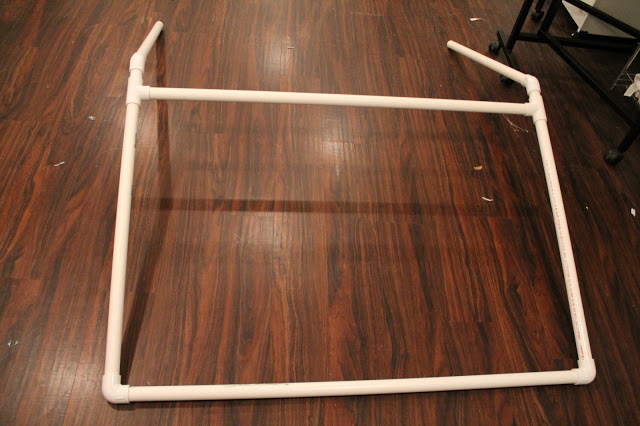
PVC Supplies:
*4 equal lengths to create a square for the top
*2 lengths for the legs
*2 3 inch pieces of PVC
*2 90 degree connectors
*2 45 degree connectors
*2 “T” connectors
*4 “U” hooks
(excuse my chaotic photo… this was done very late at night and I was pretty much delirious:)
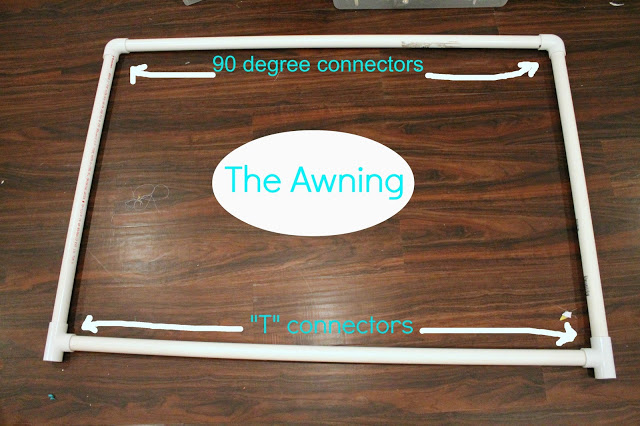
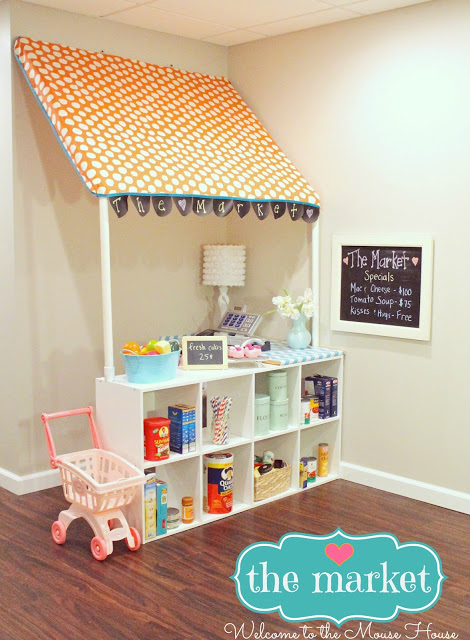
Create the awning by joining your 4 equal lengths together. Use the 90 degree connectors at the top corners and the “T” connectors at the bottom corners.
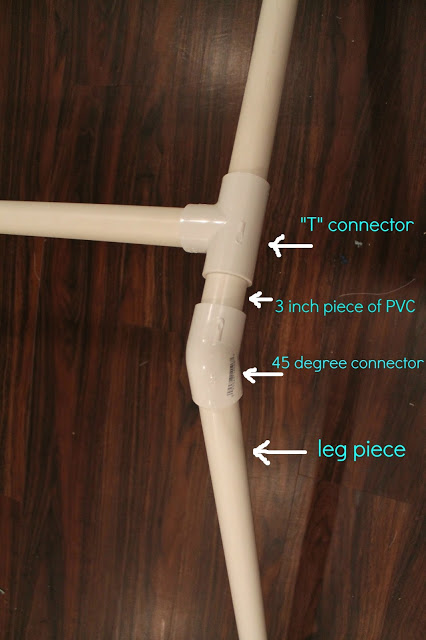
Now, you are going to create the legs.
Attach your 3 inch piece of PVC to the “T” connector.
Then, attach your 45 degree connector.
Finally, attach your leg piece.
Clear as mud?
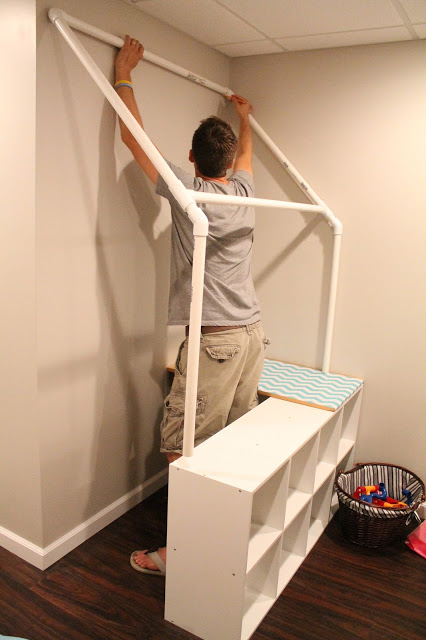
Attach the other leg and it should now look like this!
Using the 4 “U” hooks, attach to the wall, using anchors if you don’t find a stud… and no, I am not talking about my husband;)
To attach the awning to the bookshelf, you can either glue it or you can find connectors with holes for drilling. Totally up to you!
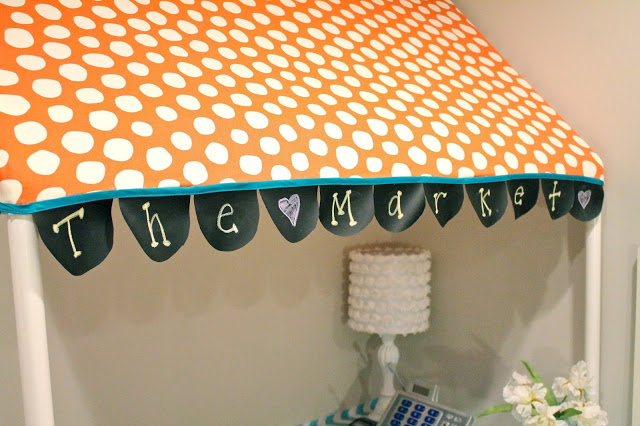
At last, it is time to attach your fabric.
Before attaching it to the frame, I sewed bias tape and the chalkboard banner to my fabric to finish the raw edges. Then, I just hot glued the fabric to the PVC pipe. Super easy!
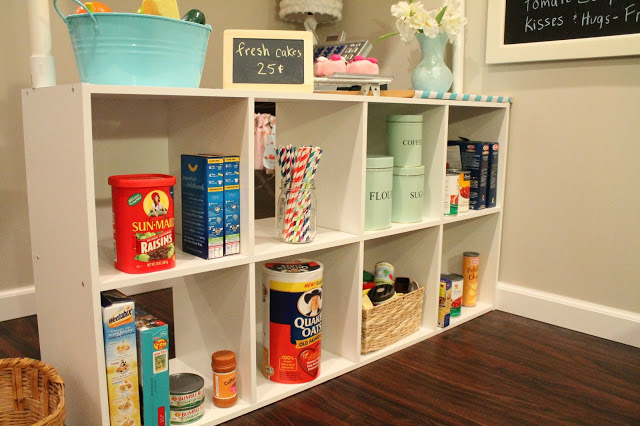
The shelves for the groceries is simply a cubby unit from Target flipped on its side!
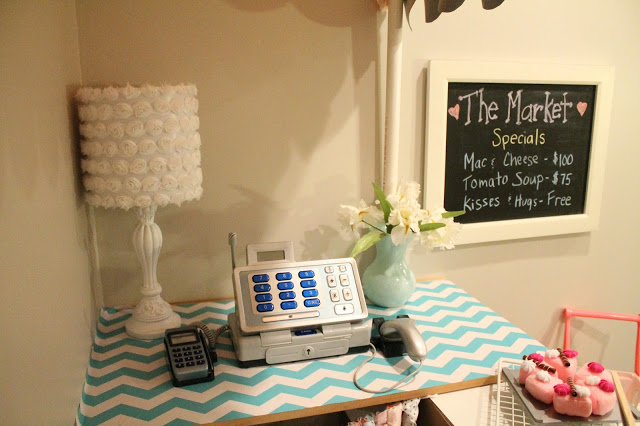
The shelf that holds the cash register was just a piece of scrap wood we had in the garage and I covered it with chevron shelf paper. The one end is attached to the wall with a 2×4 and the other end is just leaning on top of the shelf.
Easy as pie!
I hope that helps! If you guys have any questions or want to know more, please feel free to message me on Facebook! As always, I would love to see your creations over on my Flickr page, too!
Hayley
Hayley Crouse is a wife, mother and multifaceted designer. Her love of sewing, crafting, cooking and interior design infuses her daily life and naturally spills over into her online presence. She pushes the envelope of her creativity and hopes that others will be inspired to do the same. She currently authors the Welcome to the Mouse House Blog, is the pattern designer behind Mouse House Creations and is a collaborative designer with Willow & Co. Patterns.
Latest posts by Hayley (see all)
- Music Room: Home Tour - January 11, 2019
- The Ace Cardigan - July 30, 2018
- Susie Halter Top and Shorts: Project Run and Play - July 18, 2018




This is seriously adorable! Your kids are going to love it!
This is great! I think I am going to have to find some room in the playroom for one…
Cute! How did you attach the pvc to the shelf?
the pvc is actually just laying on top but you could screw it in with a cap
Where did u get that cash register??
the cash register was from Toys R Us
I love this so much! Such a darling idea and it looks totally doable! I’d like to feature it on my “Frugal Christmas Countdown” at Super Savings. Do you know how much it cost to put this together?
~ Mara
that would be great Mara! I believe it cost us around $45 since we had most of the supplies already 🙂
Love this tutorial! Do you know what size PVC pipe you used? We were looking at 3/4″ so the frame wouldn’t be too heavy, but I’m worried it might be too flimsy.
Hi, I am working on making this right now. What are your lengths for the top frame and height of the legs? Also, what size PVC did you use?
Thanks! This is awesome! My kids are gonna love it!
I was looking to buy a grocery stand for my son and came across yours… this is simply amazing and looks better than any other I’ve seen. I am not very crafty, but I think I might give it a try…
Love this! How much fabric did you need for this project?