Today, I have Alexis from Ranch Roots showing us how to make a super cute Shabby Chic Chevron Pillow! Thanks so much Alexis!
***************************************************************************
Hey all! My name is Alexis and I am incredibly excited to be guest posting here today! I am a big fan of Hayley and her adorable blog. I have a humble little blog at ranchroots.blogspot.com where I share projects I do around the house and pictures from our cozy life on the ranch, I hope you’ll mosey by for a visit!
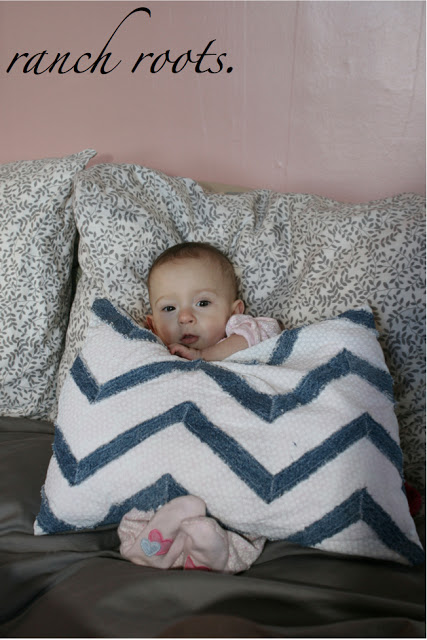
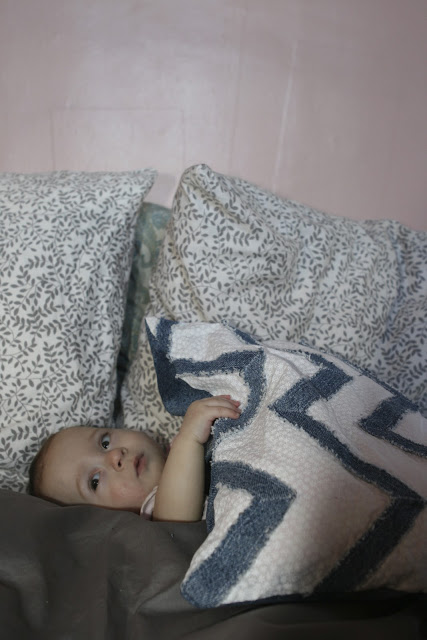
Today I’m going to share a quick tutorial on making this cute and super simple “shabby chic” chevron pillow using an old pair of jeans and a small piece of fabric.
Materials:
- Sewing Machine
- Jeans (make sure they aren’t ‘stretch’ jeans because they won’t fray)
- 13” x 16” pre-washed fabric piece (will vary depending on jean size)
- Coordinating thread
- Pillow insert
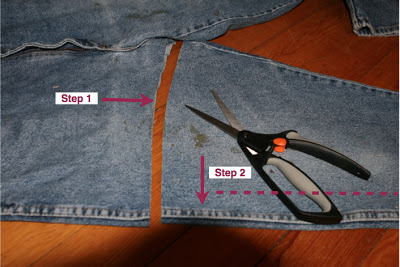
Step 1 – Start by cutting off the jean legs right below the inseam. See below, excuse the large headed shadow 🙂
Step 2 – On each leg, from the outer seam (see above) cut down the front of the leg approximately 1” from the seam. Cut off the inner seam from the original jean leg.
Step 3 – Using the widest portion from each leg trim your denim into two rectangles, mine were roughly 13” tall by 11” wide (seaming on jeans running vertically).
Step 4 – Run a zig zag stitch around the raw edges of each denim square to prevent fraying.
Step 5 – Along the original jean seam, fold the denim back as close as possible to the seam edge and pin. Repeat on second piece.
Step 6 – Place the denim right side up on your machine to provide the best visibility. Using a straight stitch get your stitch as close as possible to the jeans original seam. Repeat.
Step 7 – Finally, the fun part! Cut strips approximately 1” wide from the remaining jean legs.
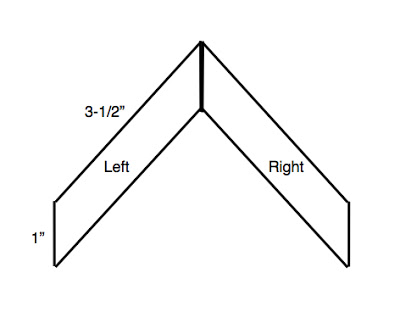
Step 8 – Make a parallelogram (If only Mrs. Yund could see my school retention here!) template, 1” wide by 3-1/2” long. You will have a “left” and “right” denim pieces, shown below. For my size I needed 8 left pieces and 12 right pieces.
Step 9 – Arrange chevron stripes on fabric and pin. I simply played with the pieces until I had the desired spacing. I wanted the face to look like a piece of fabric had been cut so I intentionally let some of the denim “fall” off the fabric edge and trimmed them to match. See below – geez, again with the big head!
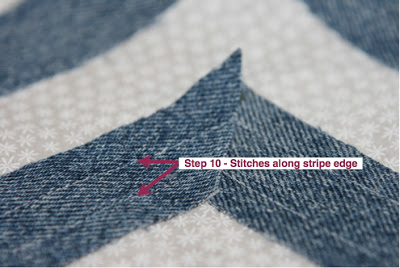
Step 10 – Using a straight stitch, stitch up each stripe twice 1/4″ away from denim edge.
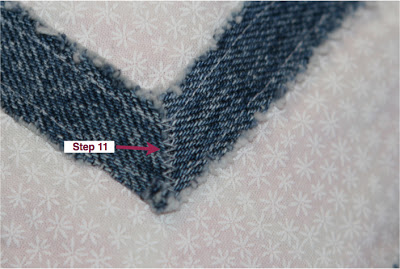
Step 11 – After the stripes were all stitched down I went back and put a zig zag stitch in between the parallel stitches of all the fabric ‘joints’ to avoid fraying here. See below.
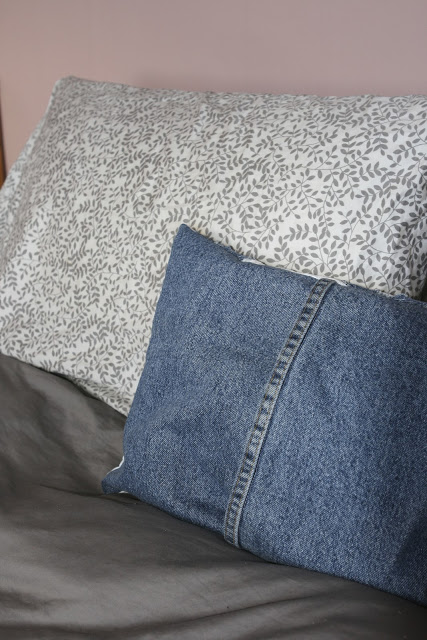
Step 12 – Place the right side of fabrics together – line the denim rectangles up with the outside edges of the “chevron” fabric and allow the original jean seams to overlap each other in the center for an envelope closure. Pin together.
Step 13 – Sew around the outside of the pillow leaving a 1/4″ seam allowance. I always back stitch on the corners for durability purposes.
Step 14 – Ta-Da! Your sewing is complete! Turn your pillow cover right side out and throw it in the washer (I did mine twice) to allow the naturally frayed edges to occur. *Warning – you will end up with denim bits in your washer that I scooped out easy enough.
Please feel free to email me at alexisdcobb@gmail.com with any questions. Thanks again and I hope you visit me over at ranchroots.blogspot.com. These jeans were a little on the big side so I have some remaining pieces left – swing by to see how I put them to use. Thanks again!
Hayley
Hayley Crouse is a wife, mother and multifaceted designer. Her love of sewing, crafting, cooking and interior design infuses her daily life and naturally spills over into her online presence. She pushes the envelope of her creativity and hopes that others will be inspired to do the same. She currently authors the Welcome to the Mouse House Blog, is the pattern designer behind Mouse House Creations and is a collaborative designer with Willow & Co. Patterns.
Latest posts by Hayley (see all)
- Music Room: Home Tour - January 11, 2019
- The Ace Cardigan - July 30, 2018
- Susie Halter Top and Shorts: Project Run and Play - July 18, 2018






No comments yet.