For day 2 of The Handcrafted Holidays, I have the lovely Emily from Nap-time Creations. She is a busy mother of 2 adorable boys, yet she still finds the time to create awesome tutorials and showcase fabulous looking recipes on her blog. Thanks for being here, Emily!
*******************************************
I’m SOO excited to be here today… Hayley was over on my blog in August for my Sew Many Books series, and I’m thrilled to be working with her again. What a fun line up for The Handcrafted Holidays series! My family is actually headed to Palau for Christmas…{not sure where that is? Click here} WHOOT!! we are SO excited to be spending Christmas at a beach… best of all my parents will be there and my brother too.
So… in preparation for our
I made these matching holiday outfits for our Christmas cards. On my blog today I’m sharing all the photos from our beach photo-shoot.. Come on over and vote for which one should become the Christmas card!
Ok, lets get to today’s tutorial.
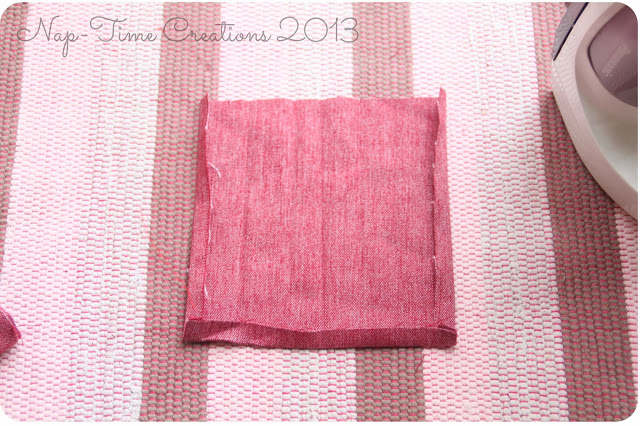
I made a simple t-shirt {use whatever pattern you have}, but left off any sort of collar or ribbing along the neckline. I used a woven fabric for my placket, but you can also use knit like your shirt. A good width is 6″, I also made mine 6″ long, but if you want more buttons or a longer placket you can add length. So now lets divide up the six inch width…
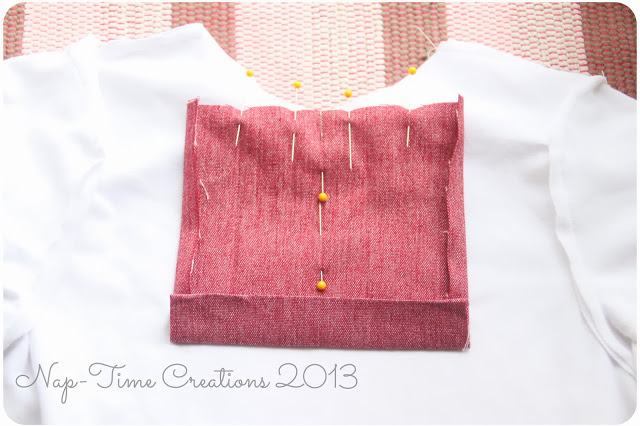
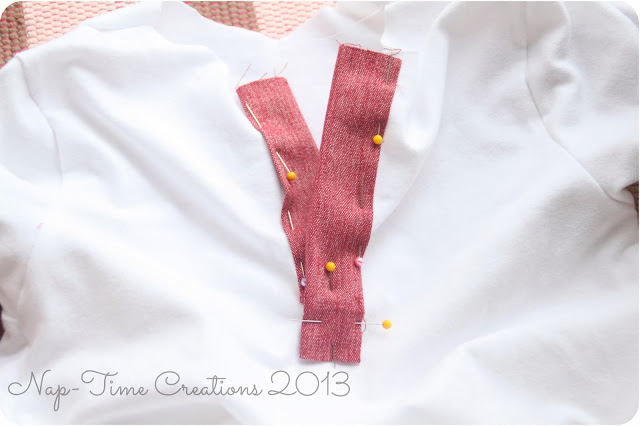
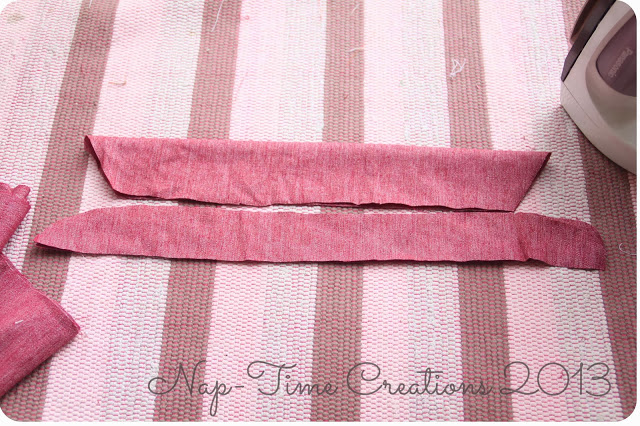
You want to end up with five, one inch ironed lines. I’ve marked with pins below. The extra inch is for the seam allowance on the side {ironed up}. Also, after you have ironed the vertical lines, iron up the bottom inch of the placket. You will also want to mark the very center. Match the center of the placket with the center of your shirt from, right sides together and pin. You do not need the pins along the top as I did, those are just to show you where to iron. Pin down the center.
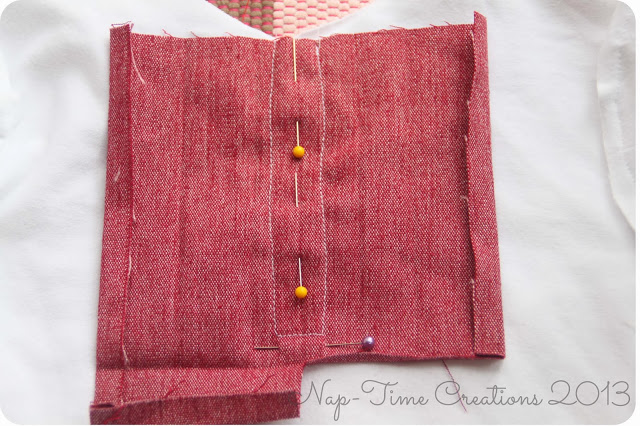
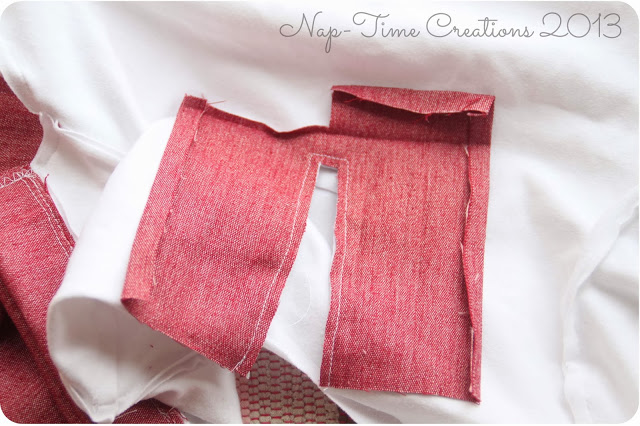
Sew inside the middle inch, down one side 1/4 inch from where you ironed, across the bottom 1/4 inch from where you ironed the inch up, and then back up the other side 1/4 inch from the iron line. It should look like this! A picture is way better than my description! Now you need to cut {aiiii!} cut from the center line up to the 1″ bottom mark and then across to the right…{when you are looking at it.}
Now you want to cut out that middle section where you just sewed. Clip the corners, but don’t clip the threads! {I’ve done it… about a million times!}
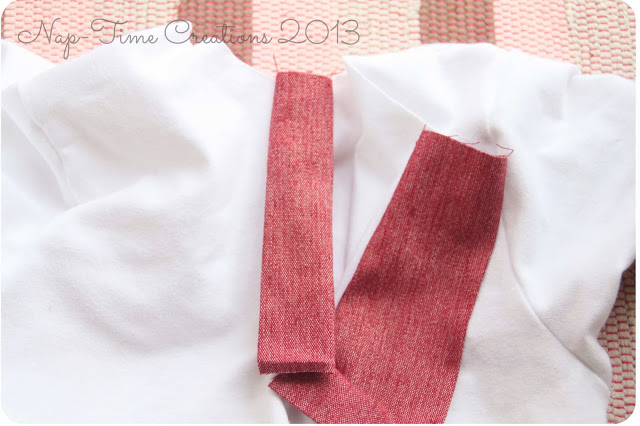
We are now going to fold the placket in on the lines we ironed. Left side… with right side facing you fold the placket so the right side is now out.
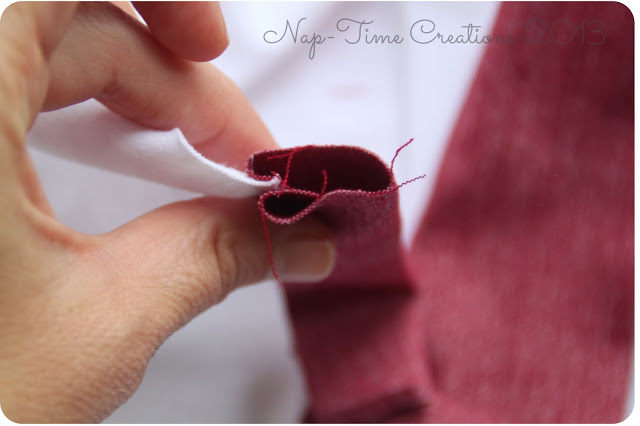
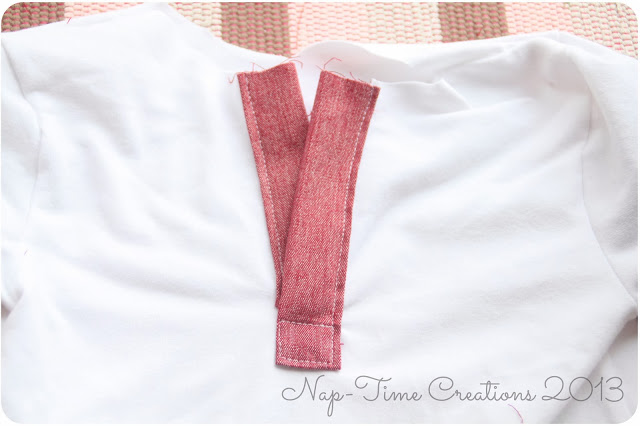
Here’s what the top will look like. Seam allowance folded over to sew a clean edge.
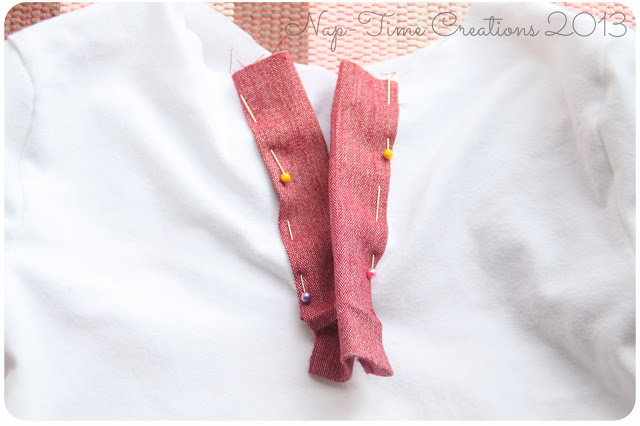
Now pin and do the other side. I fold and pin the two outer edges before I tackle the bottom. It takes a bit of finagling to get the bottom lined up and straight.
All pinned down. You can see I have a cross of pins at the bottom keeping it all together. Make sure to keep the bottom layer of the placket all tucked under the top layer.
I like to sew a square at the bottom, but you can stitch how you like.
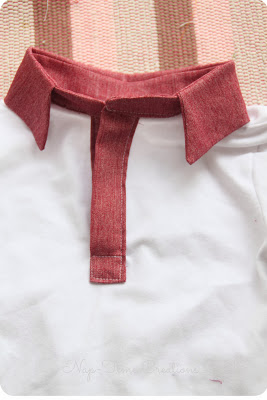
I wish I could say I had a great collar tutorial, but I just wing it.. I measure around the neck and make the collar stand that length… I cut a piece about an inch tall with rounded corners. The collar is slightly taller with pointed corners {trace a collar you already have!} I did a tutorial last year on putting the collar together. See collar tutorial here.
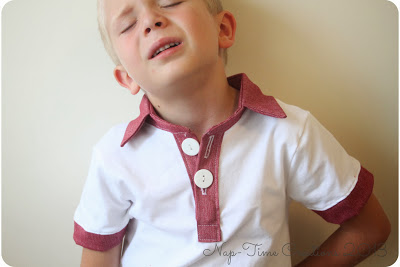
Now you just have to add some {dreaded} button holes, buttons and you are all set… Set for the meltdown that ensued with I asked him to try it on for this photo… I can’t win ’em all!
He was much happier a week later at the actual shoot, so I can’t complain…
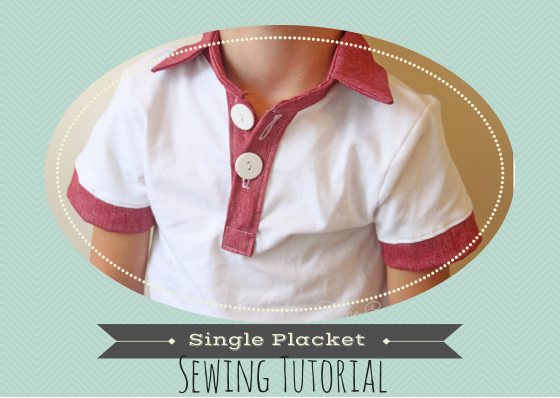
The result is one classy shirt for a classy kid!
Sources for family outfits
Shorts with pockets Melly Sews
Tie Tutorial Ehow
Paper Bag Skirt Jule for Unique People
Remember to come on over to my blog and and weigh in on your favorite photo.
I hope you enjoyed this placket tutorial and a big thanks to Hayley for having me!
Hayley
Hayley Crouse is a wife, mother and multifaceted designer. Her love of sewing, crafting, cooking and interior design infuses her daily life and naturally spills over into her online presence. She pushes the envelope of her creativity and hopes that others will be inspired to do the same. She currently authors the Welcome to the Mouse House Blog, is the pattern designer behind Mouse House Creations and is a collaborative designer with Willow & Co. Patterns.
Latest posts by Hayley (see all)
- Music Room: Home Tour - January 11, 2019
- The Ace Cardigan - July 30, 2018
- Susie Halter Top and Shorts: Project Run and Play - July 18, 2018






Adorable, Christmas in Symmer is awesome!!
The “come over to my blog” link is not working.
What a cute shirt!
I am working on one of these this week Emily! Thanks again!
So cute. I love it. Thank you